Difference between revisions of "Heart"
| Line 24: | Line 24: | ||
After collection, hearts will reappear a little after a minute. | After collection, hearts will reappear a little after a minute. | ||
| + | == Drawn to Life: The Next Chapter == | ||
| + | {{InfoCreation | ||
| + | |image = | ||
| + | <tabber> | ||
| + | |-|Drawn Preset=[[File:Heart Preset.png]] | ||
| + | |-|Template Page=[[File:DrawingHealth.png]] | ||
| + | </tabber> | ||
| + | |name = Heart | ||
| + | |use = To heal the [[Hero]] | ||
| + | |type = Level Object | ||
| + | |template = No | ||
| + | |guide = Yes | ||
| + | |created = [[Forgotten Library]] | ||
| + | |levels = Almost All Levels | ||
| + | |games = {{Icon|TNC}} | ||
| + | }} | ||
| + | {{Quote | ||
| + | |text=Pick up this health item to repair damage done to [Hero]'s body. | ||
| + | |character=Draw Prompt | ||
| + | }} | ||
| + | In the sequels, '''Hearts''' become a creation object, and there are only one kind. In the DS version, they completely heal the [[Hero]], can be found in every level except the [[Forgotten Library]], and are drawn in [[Baki Basement]]. | ||
| + | |||
| + | =={{Icon|Tower}} Appearance== | ||
| + | Due to the Heart being a creation object, the appearance of this object is completely dependent on the player. They are still restricted to the area provided. | ||
| + | |||
| + | The preset drawing for this creation is a standard pink heart. | ||
| + | {{BR|Clear}} | ||
| + | =={{Icon|Button}} Levels== | ||
| + | <tabber> | ||
| + | |-|Turtle Rock = | ||
| + | <div style="margin-top: 5px;"> | ||
| + | <table style="width:100%; padding-top:10px;"> | ||
| + | <tr> | ||
| + | <td> | ||
| + | <center>[[File:TR BakiBasement.png|link=Baki Basement]]<br>[[Baki Basement]]</center> | ||
| + | </td> | ||
| + | </tr> | ||
| + | </table> | ||
| + | </div> | ||
| + | |-|Watersong = | ||
| + | <table style="width:100%; padding-top:10px;"> | ||
| + | <tr> | ||
| + | <td><center> [[File:WS FarawayBeachCard.png|link=Faraway Beach]] <br> [[Faraway Beach]] </center></td> | ||
| + | <td><center> [[File:WS SymphonicFalls.png|link=Symphonic Falls]] <br> [[Symphonic Falls]] </center></td> | ||
| + | <td><center> [[File:WS RockinRuins.png|link=Rockin' Ruins]] <br> [[Rockin' Ruins]] </center></td> | ||
| + | </table> | ||
| + | <table style="width:100%; padding-top:10px;"> | ||
| + | <tr> | ||
| + | <td><center> [[File:Canalroyale.png|link=Canal Royale]] <br> [[Canal Royale]] | ||
| + | </center></td> | ||
| + | <td><center> [[File:WS JivinRooftops.png|link=Jivin' Rooftops]] <br> [[Jivin' Rooftops]] </center></td> | ||
| + | <td><center> [[File:WS RhythmicReef.png|link=Rhythmic Reef]] <br> [[Rhythmic Reef]] </center></td> | ||
| + | </table> | ||
| + | <table style="width:100%; padding-top:10px;"> | ||
| + | <tr> | ||
| + | <td><center> [[File:WS CrescendoCove.png|link=Crescendo Cove]] <br> [[Crescendo Cove]] </center></td> | ||
| + | <td><center> [[Image:WS GhastlyGhostship.png|link=Ghastly Ghostship]] <br> [[Ghastly Ghostship]] </center></td> | ||
| + | <td><center> [[File:WS_TheAbyss.png|link=The Abyss]] <br> [[The Abyss]] | ||
| + | </center></td> | ||
| + | </table> | ||
| + | <table style="width:100%; padding-top:10px;"> | ||
| + | <tr> | ||
| + | <td><center> [[Image:WS BakiBeardsShip.png|link=BakiBeard's Ship]] <br> [[Bakibeard's Ship]] </center></td> | ||
| + | </tr> | ||
| + | </table> | ||
| + | |-|Lavasteam = | ||
| + | <table style="width:100%; padding-top:10px;"> | ||
| + | <tr> | ||
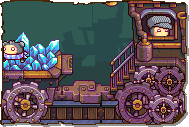
| + | <td><center> [[File:LS CrystalCaverns.png|link=Crystal Caverns]] <br> [[Crystal Caverns]] </center></td> | ||
| + | <td><center> [[Image:LS MinecartMayhem.png|link=Mine Cart Mayhem]] <br> [[Mine Cart Mayhem]] </center></td> | ||
| + | <td><center> [[File:LS RockyRailroad.png|link=Rocky Railroad]] <br> [[Rocky Railroad]] </center></td> | ||
| + | </table> | ||
| + | <table style="width:100%; padding-top:10px;"> | ||
| + | <tr> | ||
| + | <td><center> [[File:LS LavaReservoir.png|link=Lava Reservoir]] <br> [[Lava Reservoir]] | ||
| + | </center></td> | ||
| + | <td><center> [[File:LS_MagmaFlowFactory.png|link=Magma Flow Factory]] <br> [[Magma Flow Factory]] </center></td> | ||
| + | <td><center> [[File:LS MotenRiver.png|link=Molten River]] <br> [[Molten River]] </center></td> | ||
| + | </table> | ||
| + | <table style="width:100%; padding-top:10px;"> | ||
| + | <tr> | ||
| + | <td><center> [[File:LS RobosaFoundry.png|link=Robosa Foundry]] <br> [[Robosa Foundry]] </center></td> | ||
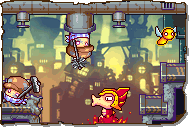
| + | <td><center> [[Image:LS_ClockworkTower.png|link=Clockwork Tower]] <br> [[Clockwork Tower]] </center></td> | ||
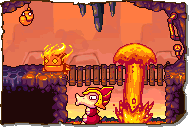
| + | <td><center> [[File:LS VolcanicCore.png|link=Volcanic Core]] <br> [[Volcanic Core]] | ||
| + | </center></td> | ||
| + | </table> | ||
| + | |-|Galactic Jungle= | ||
| + | <table style="width:100%; padding-top:10px;"> | ||
| + | <tr> | ||
| + | <td><center> [[File:GJ CosmicBog.png|link=Cosmic Bog]] <br> [[Cosmic Bog]] </center></td> | ||
| + | <td><center> [[Image:GJ_IronArboretum.png|link=Iron Arboretum]] <br> [[Iron Arboretum]] </center></td> | ||
| + | <td><center> [[File:GJ CraterPass.png|link=Crater Pass]] <br> [[Crater Pass]] </center></td> | ||
| + | </table> | ||
| + | <table style="width:100%; padding-top:10px;"> | ||
| + | <tr> | ||
| + | <td><center> [[File:GJ StarlightStarfight.png|link=Starlight Starfight]] <br> [[Starlight Starfight]] | ||
| + | </center></td> | ||
| + | <td><center> [[Image:GJ ScrambleTower.png|link=Scramble Tower]] <br> [[Scramble Tower]] </center></td> | ||
| + | <td><center> [[File:GJ SteelyThicket.png|link=Steely Thicket]] <br> [[Steely Thicket]] </center></td> | ||
| + | </table> | ||
| + | <table style="width:100%; padding-top:10px;"> | ||
| + | <tr> | ||
| + | <td><center> [[Image:GJ LunarRise.png|link=Lunar Rise]] <br> [[Lunar Rise]] </center></td> | ||
| + | <td><center> [[Image:GJ TechnoSpires.png|link=Techno Spires]] <br> [[Techno Spires]] </center></td> | ||
| + | <td><center> [[File:GJ TreetopTurrets.png|link=Treetop Turrets]] <br> [[Treetop Turrets]] | ||
| + | </center></td> | ||
| + | </table> | ||
| + | |-|Wilfre's Wasteland= | ||
| + | <table style="width:100%; padding-top:10px;"> | ||
| + | <tr> | ||
| + | <td><center> [[Image:WW DripDropDocks.png|link=Drip Drop Docks]] <br> [[Drop Drop Docks]] </center></td> | ||
| + | <td><center> [[Image:WW SunBurnBay.png|link=Sun Burn Bay]] <br> [[Sun Burn Bay]] </center></td> | ||
| + | <td><center> [[File:WW UndergroundTown.png|link=Underground Town]] <br> [[Underground Town]] </center></td> | ||
| + | </table> | ||
| + | <table style="width:100%; padding-top:10px;"> | ||
| + | <tr> | ||
| + | <td><center> [[Image:WW VolcanicEruption.png|link=Volcanic Eruption]] <br> [[Volcanic Eruption]] | ||
| + | </center></td> | ||
| + | <td><center> [[Image:WW ToggleTower.png|link=Toggle Tower]] <br> [[Toggle Tower]] </center></td> | ||
| + | <td><center> [[File:WW StellarShowdown.png|link=Stellar Showdown]] <br> [[Stellar Showdown]] </center></td> | ||
| + | </table> | ||
| + | <table style="width:100%; padding-top:10px;"> | ||
| + | <tr> | ||
| + | <td><center> [[Image:WW MysticManor.png|link=Mystic Manor]] <br> [[Mystic Manor]] </center></td> | ||
| + | <td><center> [[Image:WW CrumblingKeep.png|link=Crumbling Keep]] <br> [[Crumbling Keep]] </center></td> | ||
| + | <td><center> [[File:WW HallOfDarkness.png|link=Hall of Darkness]] <br> [[Hall of Darkness]] | ||
| + | </center></td> | ||
| + | </table> | ||
| + | </tabber> | ||
| + | |||
| + | |||
| + | =={{Icon|Painting}} Media== | ||
| + | <gallery widths="310" captionsize="medium" captiontextcolor="#8e8e8e" bordersize="none" bordercolor="transparent" captionalign="center" spacing="small" position="center"> | ||
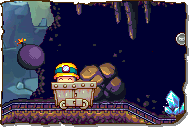
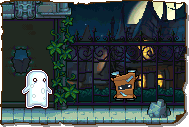
| + | HeartDrawingLocation.png|The area where this creation is drawn. | ||
| + | HeartDrawingPrompt.png|The drawing prompt for this creation. | ||
| + | </gallery> | ||
[[Category:Objects]] | [[Category:Objects]] | ||
[[Category:Drawn to Life]] | [[Category:Drawn to Life]] | ||
| + | |||
| + | [[Category:Objects]] | ||
| + | [[Category:Drawn to Life: The Next Chapter]] | ||
| + | [[Category:Creations in Drawn to Life: The Next Chapter]] | ||
| + | [[Category:Creations]] | ||
| + | [[Category:Turtle Rock]] | ||
Revision as of 23:40, 26 March 2021
Hearts are the healing items in the Drawn to Life series.
In most cases, the Hero can take damage up to five times before dying. When damage is received, colored portions of the Hero's body are removed, exposing the mannequin. The order of exposure starts with the arms; then legs; torso; and finally the head, exposing the entire mannequin. If they are hit after that, the Hero loses a life and has to restart that section of the level. If the Hero has no lives left at the time of death, then a game over message will appear on the screen and the game will continue from the last save point.
Drawn to Life
| Heart | |
| Use | To heal the Hero |
| Village Object | No |
| Retrieved | N/A |
| Location | All levels in Drawn to Life |
| Games | |
There are two types of hearts in the first game: Small and Large. Small hearts restore damage from up to two hits, whilst large hearts will fully restore The Hero's health.
After collection, hearts will reappear a little after a minute.
Drawn to Life: The Next Chapter
–Draw Prompt
In the sequels, Hearts become a creation object, and there are only one kind. In the DS version, they completely heal the Hero, can be found in every level except the Forgotten Library, and are drawn in Baki Basement.
 Appearance
Due to the Heart being a creation object, the appearance of this object is completely dependent on the player. They are still restricted to the area provided.
The preset drawing for this creation is a standard pink heart.
 Levels

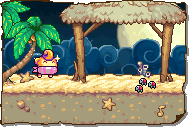
 Faraway Beach |
 Symphonic Falls |
 Rockin' Ruins |
 Canal Royale |
 Jivin' Rooftops |
 Rhythmic Reef |
 Crescendo Cove |
 Ghastly Ghostship |
 The Abyss |
 Bakibeard's Ship |
 Crystal Caverns |
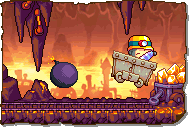
 Mine Cart Mayhem |
 Rocky Railroad |
 Lava Reservoir |
 Magma Flow Factory |
 Molten River |
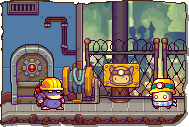
 Robosa Foundry |
 Clockwork Tower |
 Volcanic Core |


 Media
Media
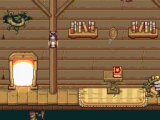
The area where this creation is drawn.
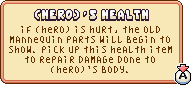
The drawing prompt for this creation.

